People are looking for smarter ways to earn online, not just harder ones. That’s why YouTube automation has blown up. You don’t need to be on camera, you don’t need a studio, and you don’t need years of editing skills. You just need the right system.
That’s what Side Hustle Income is about. We cut through the noise and show you practical ways to build income streams that actually work. In this guide, I’ll walk you through the full YouTube automation process—niche research, script writing, AI voices, thumbnails, editing, uploading, and more. By the end, you’ll know exactly what tools to use, how much you could realistically make, and where the real opportunities are hiding.
Why is this the right time? Because YouTube is paying out billions each year, AI tools are now cheap and easy to use, and niches with high ad rates are still wide open for new creators. In 2025, the people who start now will be the ones looking back a year from today with growing channels and steady income. This article is your starting point.
What is YouTube Automation?
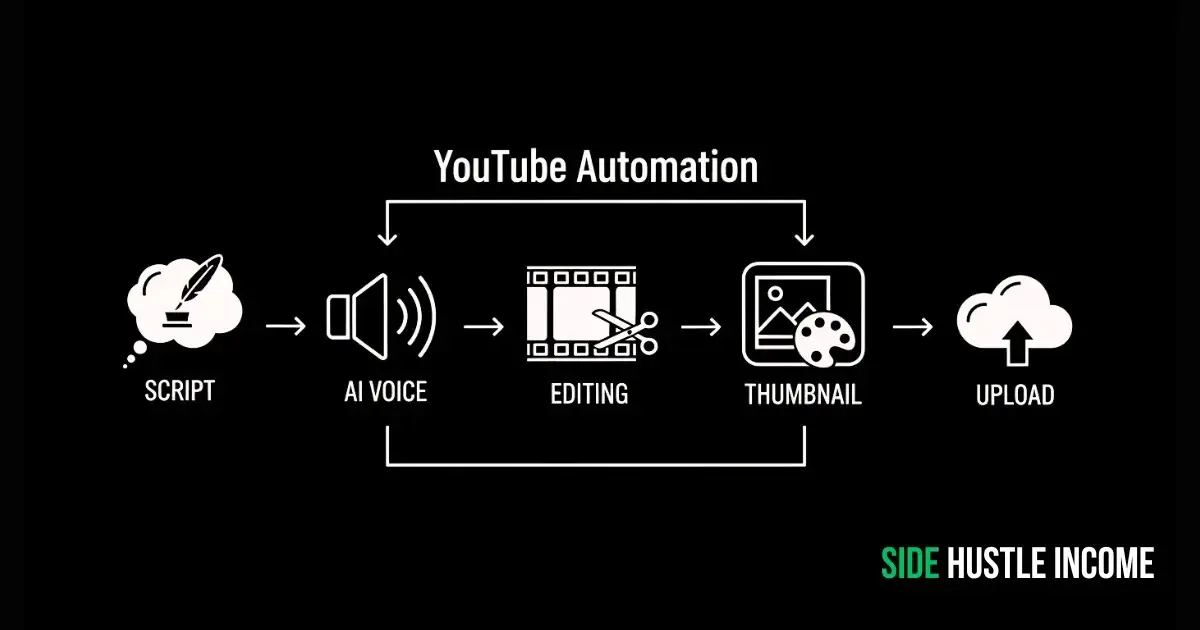
At its core, YouTube automation means running a channel without handling every single task yourself. Instead of writing, recording, editing, and designing everything on your own, you build a system where tools and freelancers do the heavy lifting.
Think of it like this:
- A scriptwriter or AI tool prepares your video script.
- A voiceover tool or freelancer records the narration.
- An editor combines stock footage, animations, and transitions.
- A thumbnail designer makes the click-worthy cover.
- You hit upload, optimize the title and description, and move on to the next video.
The result is a channel that grows without demanding all your time. Some people manage multiple channels this way, treating them like digital assets. Others focus on just one channel but use automation to keep a consistent upload schedule.
This model works for beginners who don’t want to be on camera and for experienced creators who want to scale faster. It’s flexible—you can do parts yourself at first, then outsource more as you grow.
Necessary Equipment for YouTube Automation
You don’t need a studio full of gear to start. A laptop with internet is enough to build your first videos. Over time, you can upgrade tools, but here’s what beginners really need:
Hardware
- Computer or Laptop: Any device that can handle basic editing.
- Microphone (optional): Only if you plan to record your own voice. Otherwise, you can skip this by using AI voice tools.
Software and Tools
| Task | Free Resources | Paid/Upgraded Options |
| Script Writing | ChatGPT free tier, Google Docs | Jasper, Copy.ai ($20–$50/month) |
| Voiceover | CapCut AI voices (free), Clipchamp AI voices | ElevenLabs, Murf, Play.ht ($15–$50/month) |
| Thumbnails | Canva free plan, Photopea, GIMP | Canva Pro, Photoshop ($10–$25/month) |
| Video Editing | DaVinci Resolve (free), CapCut, OpenShot | Premiere Pro, Final Cut ($20–$300/yr) |
| Stock Footage/Images | Pexels, Pixabay, Unsplash | Storyblocks, Envato Elements ($20–$40/month) |
| Image Generation | Bing Image Creator (free DALL·E), Canva AI images | MidJourney, Leonardo AI ($10–$30/month) |
Cost Snapshot for Beginners
- Using only free tools, you can start with $0 extra cost.
- If you mix free + low-cost tools, expect about $20–$50/month.
- A full professional setup can run $100+/month.
Starting free makes sense. As your channel grows, reinvesting into paid tools helps with speed, quality, and consistency.
Benefits of YouTube Automation
YouTube automation isn’t just about saving time. It changes how you approach content creation and lets you treat your channel like a real business.
Key Benefits
- Scalability: Once the system is in place, you can run multiple channels or upload more frequently without burning out.
- No Face, No Camera: Perfect for people who want privacy or feel uncomfortable on screen.
- Flexibility: Do some tasks yourself, outsource the rest, or let AI handle it.
- Consistency: Automated workflows keep videos going live even when you’re busy.
- Multiple Income Streams: Beyond ads, you can add sponsorships, affiliate links, and digital products.
Quick Checklist for Beginners
- Pick one niche with proven demand.
- Use free tools first (scripts, voice, thumbnails).
- Focus on publishing at least 2–3 videos weekly.
- Track what performs and double down on winning topics.
- Reinvest revenue into better tools or freelancers.
Pros and Cons of YouTube Automation
YouTube automation looks attractive because it promises income without showing your face. That’s true, but the full picture is more nuanced. Here’s what you gain—and what you need to watch out for.
Pros That Matter
- Low entry barrier: You don’t need expensive gear, and free tools are enough to begin.
- Scalable system: Once one channel works, you can repeat the process with new niches.
- Evergreen content: Many faceless channels post tutorials, explainers, or list-style videos that keep pulling views for years.
- Multiple monetization angles: AdSense is just one stream. Affiliate links, sponsorships, and even selling digital products can be layered in.
- Time leverage: Outsourcing or AI lets you create without chaining yourself to the editing desk.
Cons You Should Expect
- Crowded niches: Finance, tech, and health are profitable, but thousands of new creators jump in every month. Standing out takes strategy.
- Slow growth at first: It may take 3–6 months to see traction. Many quit before hitting monetization.
- Ongoing costs: If you rely on freelancers, the monthly bill can outpace revenue early on.
- Platform dependence: A YouTube policy shift can cut your reach or ad rates overnight.
- Quality gap with AI: While AI tools are powerful, low-quality scripts or robotic voices won’t hold viewers. Human touch is still key.
Honest Comparison
| Strengths | Weak Spots |
| Easy to start with free tools | Highly competitive niches |
| Can scale into multiple channels | Earnings can be slow to appear |
| Evergreen content keeps views coming | Outsourcing can get expensive |
| Many revenue streams, not just ads | Dependent on YouTube policies |
| AI + freelancers save time | AI content still needs quality control |
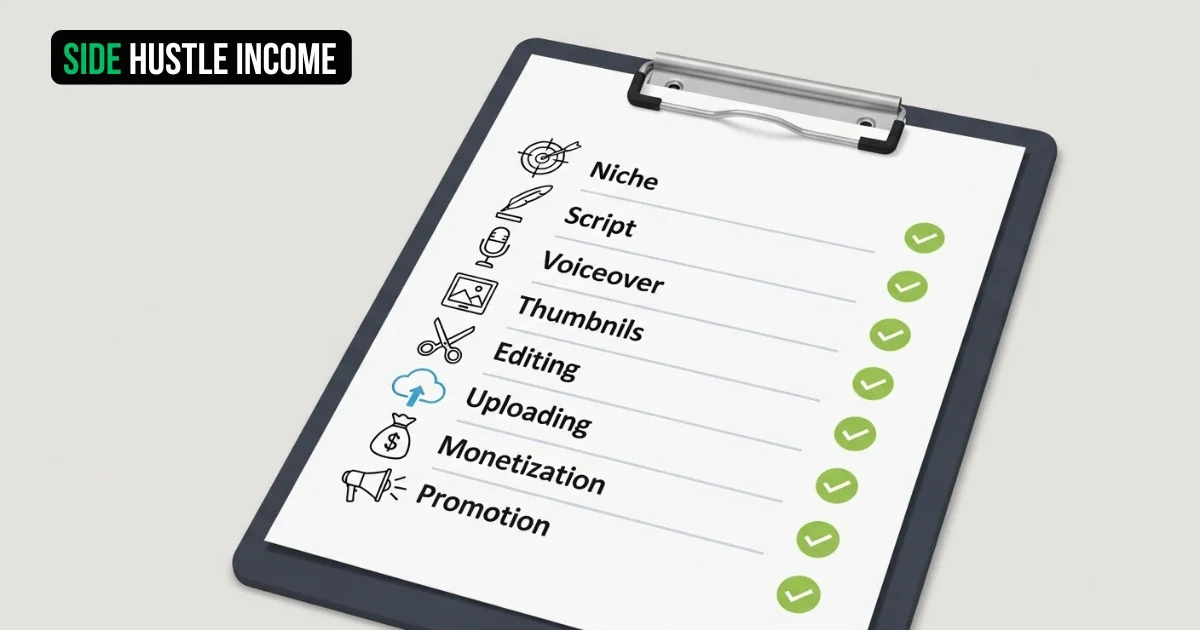
Step-by-Step Workflow for YouTube Automation
Running an automated channel isn’t random. It’s a repeatable process. Here’s how to build it from the ground up.
Step 1: Niche Research
If you’re new, niche research is the foundation of your channel. Most beginners skip this step and end up frustrated when their videos get only a few views. Don’t rush it. Here’s how to approach it the smart way.
1. Understand What “Niche” Means on YouTube
A niche is the main theme of your channel. It tells viewers and the algorithm what your content is about. In automation, you want niches that:
- Can generate high advertiser interest (so you get higher RPM).
- Have consistent search demand (people search every day, not just during trends).
- Allow content at scale (you can make 100+ video ideas without running out).
2. Start With Broad Categories, Then Narrow Down
Instead of just saying “finance,” think of sub-niches like:
- Credit cards
- Side hustles
- Stock market basics
- Personal budgeting
This makes your channel more focused and more trustworthy in YouTube’s algorithm.
3. Research Using Free Tools
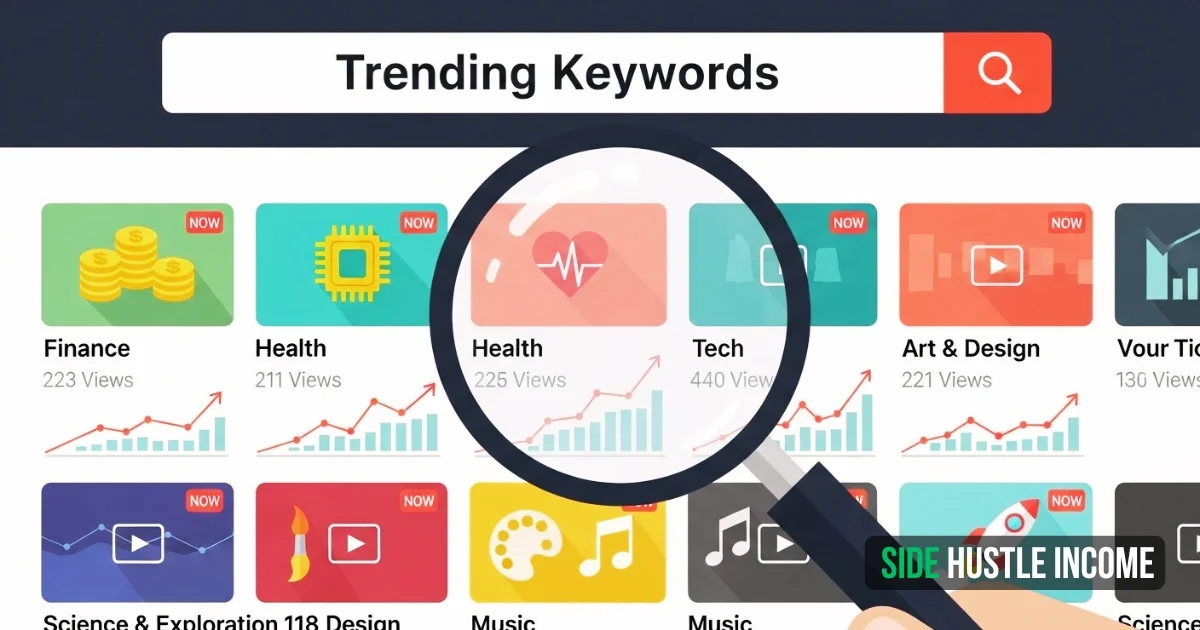
- YouTube Search Bar: Type “how to” or “best” and let auto-suggest show trending searches.
- Google Trends: Compare two niches side by side and see which has more consistent interest.
- VidIQ / TubeBuddy Free Versions: Chrome extensions that show competition and search volume for keywords.
- Competitor Channels: Sort videos by “Most Popular” and note which topics get the highest views.
4. Test Profitability With RPM Potential
YouTube doesn’t show RPM upfront, but you can estimate by looking at:
- Type of advertisers: Finance, tech, and business attract higher-paying ads.
- Audience location: U.S., U.K., Canada, and Australia audiences bring higher ad rates than many other countries.
- Video style: Tutorials and reviews usually outperform entertainment-only content in RPM.
5. Beginner-Friendly Path
If you’re starting from zero:
- Pick a niche you actually find interesting—you’ll need to research and write scripts in it.
- Make a list of 20–30 potential video titles (use YouTube auto-suggest for help).
- Check if other channels in the niche are consistently hitting 50k–100k+ views.
- Narrow down to a sub-niche where you can find gaps—topics that aren’t covered deeply yet.
6. Automation Angle
When choosing a niche, think about content that works well automated:
- List videos: “Top 10 fastest cars”
- Explainers: “How compound interest works”
- Comparisons: “iPhone vs. Samsung: Which is better in 2025?”
- Tutorials: “How to use ChatGPT for study hacks”
These formats are easier to script, voice over, and edit with stock footage or AI-generated visuals.
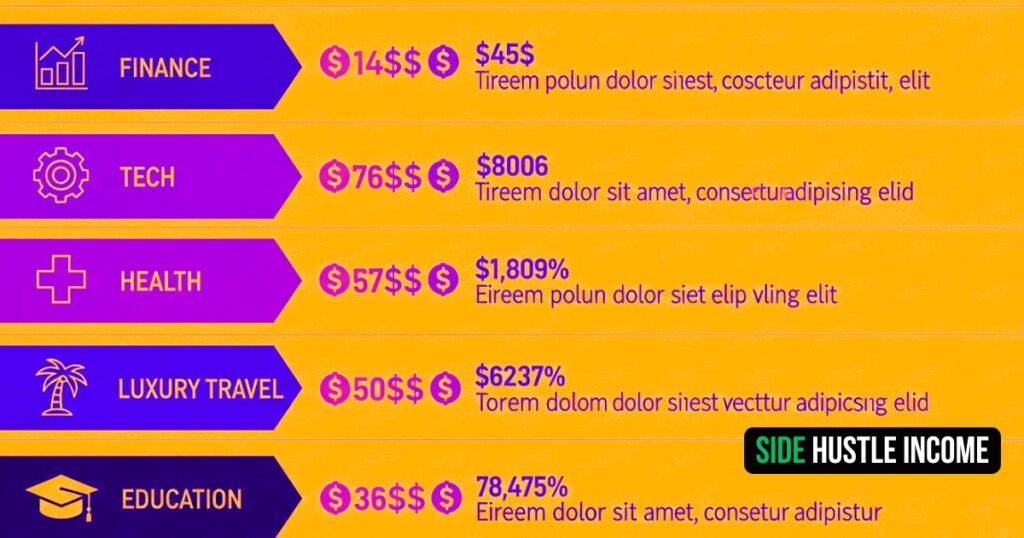
7. Profitable Niches in 2025
| Niche | Why It Works | Average RPM (USD) | Example Video Ideas |
| Personal Finance | Advertisers pay top rates in this field | 12–25 | “5 Best High-Yield Savings Accounts in 2025” |
| Tech & AI Tools | Explosive demand for AI and gadgets | 8–15 | “Top 10 AI Tools for Productivity” |
| Health & Fitness | Evergreen demand, easy to automate with stock clips | 7–12 | “10 Minute Morning Workout for Beginners” |
| Online Business & Side Hustles | Massive audience chasing financial freedom | 10–20 | “Best Side Hustles That Work in 2025” |
| Luxury & Travel | Premium advertisers, viral potential | 15–30 | “Inside the World’s Most Expensive Resorts” |
| Education & Tutorials | Constantly searched, trusted niche | 6–12 | “How to Use Excel Like a Pro” |
Pick one, focus, and commit. Most new creators fail because they try five different niches at once and confuse the algorithm. One niche, consistent uploads—that’s the winning formula.
Step 2: Script Writing
Your script decides whether viewers stay or click away. A polished thumbnail may get the click, but only a good script keeps people watching—and watch time is what drives real YouTube growth.
Why Script Writing Matters
In automation, your script replaces your personality on screen. It gives your video structure, rhythm, and flow. A solid script makes even AI voices sound engaging.
Free Script Resources for Beginners
- ChatGPT free plan: Great for generating outlines and rough drafts.
- Google Docs: Write, edit, and store scripts online.
- YouTube transcripts: Many videos have captions you can scan for tone and pacing.
Paid and Advanced Options
- Jasper.ai: Helps with longer, polished scripts ($39+/month).
- Freelancers (Fiverr/Upwork): Human writers who can create original scripts for $10–$50.
- AI storytelling platforms: Tools trained for YouTube pacing.
Pro Tips for Writing Winning Scripts
- Start with a hook: A question, surprising stat, or bold promise in the first 15 seconds.
- Example: “Did you know the average YouTuber earns less than $3 per 1,000 views—unless they’re in the right niche? Today, I’ll show you how to find those niches.”
- Follow a simple structure: Hook → Main points → Key takeaway.
- Write for the ear, not the eye: Keep sentences short and conversational.
- Drop curiosity breadcrumbs: Say things like “Tip #5 will surprise you” to keep viewers watching.
- End with action: A call to comment, subscribe, or check out another video.
Safe Research (Avoiding Copy-Paste Traps)
Beginners often ask: “Can I use other people’s scripts?” The answer is no. Copy-paste will hurt your channel. But you can study and model:
- Watch a few top videos in your niche.
- Write down their structure: How do they open? How do they transition?
- Note the pacing: Short sentences? Humor? Storytelling?
- Take the concepts, not the words. Then rewrite in your own style or with AI help.
Example:
- A finance video may start with a stat about average debt.
- A tech video may start with a new gadget release.
- A health video may start with a shocking myth-buster.
You’re not copying; you’re analyzing what works and then creating something original.
Quick Beginner Workflow
- Use YouTube search to find the top 5 videos in your niche.
- Analyze their intros, main body, and conclusions.
- Draft your own outline based on the same flow.
- Use AI or your own words to expand the outline into a script.
- Edit for clarity, engagement, and originality.
Step 3: Voiceover
Even the best script falls flat if the voiceover sounds robotic or low quality. Viewers click away fast, and worse, YouTube may reject monetization if the voice is flagged as “synthetic.” Getting this right is non-negotiable.
Why Voiceover Matters
- A clear, natural voice builds trust.
- High-quality audio keeps viewers watching longer.
- YouTube’s monetization team checks if your content is unique and engaging—bad AI voices risk demonetization.
Free Tools for Beginners
| Tool | Features | Pros | Cons |
| CapCut AI Voices | Basic text-to-speech inside CapCut | Free, easy to use | Limited variety, may sound flat |
| Clipchamp (Microsoft) | Built-in AI voices | Free, good for short videos | Robotic if overused |
| TTSMP3.com | Converts text to speech | Free basic access | Quality is inconsistent |
Paid and Professional Tools
| Tool | Features | Pros | Cons |
| ElevenLabs | Advanced AI with natural tones | Sounds close to human, wide voice options | Paid plan after free trial ($5–$22/month) |
| Murf.ai | Studio-quality voices | Great for professional channels | $19+/month |
| Play.ht | Large voice library, easy export | Strong natural intonation | Higher cost for premium ($20+/month) |
| Human Freelancers (Fiverr/Upwork) | Real human narration | 100% safe for monetization | Costs $20–$100 per video |
Pros and Cons of AI Voiceovers
Pros
- Fast and affordable.
- Many tools sound natural enough for casual niches.
- Easy to scale with multiple channels.
Cons
- Some AI voices still sound robotic.
- Risk of demonetization if YouTube thinks content is low-effort.
- Lack of emotional depth compared to human voices.
Pro Tips for Monetization-Safe Voiceovers
- Avoid free, generic voices used by thousands—they trigger YouTube reviewers. Upgrade to a higher-quality plan if possible.
- Add variation in tone and pacing: Edit pauses, speed, and emphasis. AI that sounds monotone will lose viewers.
- Mix human editing with AI: Even just adjusting speed and adding natural pauses makes a difference.
- Test with short uploads: Post unmonetized test videos to confirm that YouTube accepts the voice style before scaling.
- If budget allows, outsource voiceovers: Even one freelance narrator can cover 10–15 scripts a month and guarantee monetization approval.
Beginner Path
- If you have a $0 budget: Start with CapCut or Clipchamp to test your channel idea.
- If you can spend $20/month: Use ElevenLabs or Murf for safer, natural-sounding voices.
- If you want 100% monetization confidence: Outsource to freelancers until your channel starts earning.
Step 4: Thumbnail Design
A thumbnail is your first impression. It decides whether people click or scroll past. You can have the best script, voiceover, and editing, but if your thumbnail doesn’t grab attention, your video dies quietly.
Why Thumbnails Matter
- They directly influence CTR (Click-Through Rate).
- YouTube recommends videos with higher CTR more often.
- A good thumbnail can double or triple your views.
Free Tools for Beginners
| Tool | Features | Pros | Cons |
| Canva Free | Ready-made templates | Easy drag-and-drop, beginner-friendly | Limited advanced features |
| Photopea | Photoshop alternative online | Free and powerful | Steeper learning curve |
| GIMP | Desktop image editor | Great for detailed edits | Not as simple as Canva |
| YouTube Screenshot + Edit | Capture and modify | Fast, cost-free | Not original if overused |
Paid or Advanced Tools
| Tool | Features | Pros | Cons |
| Canva Pro | Premium templates & assets | Clean designs fast | $10–$13/month |
| Photoshop | Professional-grade control | Industry standard, endless flexibility | Subscription cost, learning curve |
| Thumbnail.ai / Snappa | Thumbnail-specific AI suggestions | Quick mockups | Paid after trial |
| Freelancers (Fiverr/Upwork) | Custom thumbnail design | Unique, eye-catching, monetization safe | $5–$20 per thumbnail |
How to Learn from Competitors
- Search your niche keywords (e.g., “best side hustles 2025”).
- Sort by Most Viewed videos.
- Study the top thumbnails:
- What colors are dominant?
- Do they use big text or no text?
- Are faces exaggerated (happy/surprised)?
- Do they focus on one object or clutter the thumbnail?
- Screenshot and save competitor thumbnails in a folder. Over time, you’ll spot patterns in what works.
Pro Tips for High-Quality Thumbnails
- Use bright, contrasting colors: They stand out against YouTube’s white/black background.
- Keep text short: 3–5 words max. Large, bold fonts.
- Faces work best: Human expressions (shock, joy, curiosity) increase clicks.
- One focal point: Don’t overload. One main object, one face, or one phrase works better than clutter.
- Test and track: Upload 2–3 thumbnails for one video (YouTube now allows A/B testing with “Thumbnail Experiments”).
Professional-Level Tips
- Zoom out test: Shrink your thumbnail to the size of your phone’s YouTube feed. If it’s unreadable, fix it.
- Color psychology: Red and yellow grab attention; green and blue feel trustworthy; purple looks premium.
- Idea recycling: If you see a style working in your niche, don’t copy it—but recreate it with your own branding, colors, and text.
Beginner Path
- Start with Canva Free: Use templates, replace images with your niche visuals, and stick to bold fonts.
- Collect 20 competitor thumbnails in your niche as reference.
- Over time, experiment with tools like Photoshop or hire a freelancer once your channel starts generating income.
Step 5: Video Editing
Editing is where your script, voiceover, and visuals come alive. Good editing keeps people engaged. Bad editing makes even the best script boring. The good news: you don’t need Hollywood skills to edit YouTube videos.
Free Tools for Beginners
| Tool | Features | Pros | Cons |
| CapCut (Desktop/Mobile) | Simple, drag-and-drop editing | Free, AI captions, built-in effects | Limited advanced features |
| DaVinci Resolve | Professional editing suite | Free, powerful for long videos | Learning curve for beginners |
| OpenShot | Lightweight, open-source | Easy to learn basics | Can feel outdated |
| iMovie (Mac only) | Clean, user-friendly | Free for Mac users | Limited advanced options |
Paid or Advanced Tools
| Tool | Features | Pros | Cons |
| Adobe Premiere Pro | Industry standard, advanced editing | Professional results, endless tutorials | Subscription cost ($20+/month) |
| Final Cut Pro (Mac) | Fast rendering, pro-level editing | One-time purchase | Mac only, pricey upfront |
| Filmora | Beginner-friendly, polished effects | Cheaper than Premiere, intuitive | Limited pro-level depth |
| Freelancers (Fiverr/Upwork) | Outsource editing | Saves time, professional finish | $15–$100 per video |
Editing Workflow for Beginners
- Import your script audio/voiceover.
- Add stock footage or images (from free sites like Pexels, Pixabay, Unsplash).
- Sync clips to narration—cut boring pauses.
- Add background music (use YouTube Audio Library or Pixabay Music, both free).
- Insert simple transitions (fade in/out, cuts).
- Overlay text for emphasis (keywords, stats, or numbers).
Pro Tips for Engaging Editing
- Keep pace fast: Switch visuals every 3–5 seconds.
- Add b-roll: Don’t just show static images—mix in videos and animations.
- Use sound layers: Background music + voiceover + occasional sound effects.
- Avoid copyright issues: Only use royalty-free footage, music, and effects.
- Rewatch your edit twice: Once for pacing, once for clarity.
Professional-Level Tips
- Use jump cuts to cut out silence and keep rhythm.
- Add motion graphics or simple animations (Canva or After Effects).
- Highlight numbers, quotes, or key phrases with on-screen text.
- Balance audio: Voice should be clear and slightly louder than background music.
Beginner Path
- If you’re new, start with CapCut or DaVinci Resolve. Both are free and good enough for professional-looking results.
- Practice by editing short 1–2 minute test videos first.
- As you grow, consider outsourcing editing to freelancers so you can focus on scaling.
Competitor Thumbnail Analysis (Example: Finance Niche)
Let’s say you’re starting a personal finance channel. You search “Best Side Hustles 2025” on YouTube and check the Most Viewed results. Here’s what you might notice:
- Colors
- Top videos often use green (money), yellow (attention-grabbing), or red (urgency).
- These colors pop against YouTube’s white and black background.
- Text Style
- Short phrases: “$500/Day,” “Easy Side Hustles,” “No Investment.”
- Fonts are bold, sans-serif, and readable even on a phone screen.
- Visual Focus
- Large dollar signs, cash stacks, or credit card icons.
- Sometimes a human face shows excitement or shock.
- Only 1–2 main elements, never cluttered.
- Consistency
- The channel uses the same color scheme and style across thumbnails.
- This builds a “brand look” that viewers recognize.
Example Comparison
| Thumbnail Element | What You See in Competitors | What You Can Do |
| Color | Bright green + yellow text | Use a similar contrast but swap in your brand colors |
| Text | “$500/Day” or “Easy Hustles” | Keep it short: e.g., “Best Side Hustles 2025” |
| Images | Money stacks, shocked face | Use stock images (Pexels) or AI-generated icons |
| Style | Minimal clutter, bold design | Follow same clarity, but avoid direct copy |
How to Apply This as a Beginner
- Collect 20–30 thumbnails from your niche and put them in a folder.
- Zoom out and look for patterns in color, text length, and focus.
- Recreate the formula, not the thumbnail. For example:
- The competitor uses “green cash + shocked face + 3 words text.”
- You use “blue piggy bank + curious face + 4 words text.”
- Keep testing—your analytics (CTR) will tell you what works.
Step 6: Image & Prompt Generation
Hook for this section
Stock photos and random Google images aren’t enough anymore. YouTube rewards originality, and AI tools now make it possible to create fresh, professional visuals—even if you can’t design.
Why AI Images Matter
- Custom images help avoid copyright strikes.
- Unique visuals make your video stand out from channels recycling the same stock footage.
- Viewers stay longer when the imagery feels tailored to the topic.
Free Resources for Beginners
| Tool | Features | Pros | Cons |
| Bing Image Creator (DALL·E) | AI-generated images | Free with Microsoft account | Limited daily credits |
| Canva Free + AI | AI image generation inside Canva | Beginner-friendly | Fewer style controls |
| Unsplash / Pexels / Pixabay | Free stock photos & videos | Legal to use, high-quality | May feel generic if overused |
Paid or Advanced Options
| Tool | Features | Pros | Cons |
| MidJourney (Discord-based) | Cinematic, detailed AI images | Incredible quality, perfect for thumbnails | $10–$30/month |
| Leonardo.ai | Easy prompts, presets for different styles | Strong for creative or futuristic visuals | Paid after trial |
| Envato Elements / Storyblocks | Stock photo + video bundles | Huge library, royalty-free | $15–$30/month |
Example Prompts for Beginners
- For Finance: “3D illustration of gold coins stacked with glowing dollar sign, clean background.”
- For Tech: “Futuristic AI robot holding a laptop, neon glow, cinematic lighting.”
- For Health: “Healthy breakfast bowl with fruits, high contrast, minimal design.”
- For Travel: “Luxury hotel with infinity pool overlooking ocean, realistic style.”
Pro Tips for High-Quality Image Use
- Stay consistent with style: If you use flat illustrations, keep all thumbnails/videos in that style.
- Use AI images as a base: Add text overlays and tweaks in Canva or Photoshop.
- Don’t overload visuals: One strong image beats a cluttered collage.
- Test realism vs. illustration: Some niches (finance, tech) perform better with bold, realistic images, while others (education, health) do well with clean illustrations.
- Keep resolution high: Export at 1280×720 minimum for thumbnails.
Professional-Level Tips
- Mix AI images with free stock footage to keep content dynamic.
- Add motion effects to still AI images (CapCut or After Effects) so they don’t look static in your videos.
- Save all your AI prompts in a document—this way you can create a consistent library of visuals for your niche.
Beginner Path
- Start free with Bing Image Creator + Canva.
- Collect 10–15 images related to your niche before editing your first video.
- Upgrade to MidJourney or Leonardo once your channel grows—you’ll instantly notice higher CTR from better visuals.
Step 7: Uploading & Optimization
YouTube doesn’t just reward good videos—it rewards smart uploads. The way you title, describe, and publish your video can be the difference between 100 views and 100,000.
Key Steps in Uploading
- Title
- Use your main keyword near the front.
- Keep it clear, clickable, and under 60 characters.
- Example: “Best Side Hustles in 2025 That Actually Pay”.
- Description
- The first 2 lines matter most (they show before “See more”).
- Include keywords naturally, add value, and place affiliate links or resources below.
- Example flow: Hook → Video summary → Links → Subscribe CTA.
- Tags
- Use broad + specific: “side hustles,” “make money online 2025,” “YouTube automation.”
- Tags don’t drive rankings like they used to, but they help YouTube understand your content.
- Thumbnail
- Upload your custom design (Step 4).
- Make sure it complements your title (together they tell one clear story).
- Playlist
- Add videos into niche playlists. This increases watch time because viewers binge related videos.
- End Screens & Cards
- Suggest another one of your videos at the end.
- Add cards for related content mid-video to reduce drop-off.
- Frequency
- Aim for 2–4 uploads per week.
- Consistency signals to YouTube that you’re an active creator.
Pro Tips for Optimization
- Keyword Research: Use TubeBuddy or VidIQ (free versions work fine) to find phrases people are searching.
- CTR Boost: Make sure your title and thumbnail don’t repeat. Example: if your thumbnail says “$500/Day,” the title should focus on “Best Side Hustles.”
- Pinned Comment: Pin your own comment with key takeaways and links—it’s the first thing viewers see under the video.
- Captions: Use YouTube’s auto-captions or upload your own for accessibility.
Professional-Level Tips
- Upload at peak hours: Check YouTube Analytics → Audience → “When your viewers are online.”
- A/B Test Thumbnails: Use YouTube’s Thumbnail Experiments feature to test 2–3 designs.
- Add Chapters: Breaking your video into timestamps helps with SEO and viewer retention.
Beginner Path
- Start simple: keyword-rich title, thumbnail, short description, 3–5 tags.
- As your channel grows, layer in playlists, pinned comments, and A/B testing.
- Never upload without at least a thumbnail + solid title—you’ll lose the momentum of YouTube’s first 48-hour push.
Section 7: Profitable Niches and High RPM Niches
Hook for this section
Not all views pay the same. A million views on a funny meme video might earn $1,000, while a million views in finance could earn $20,000 or more. That’s why choosing the right niche isn’t just about interest—it’s about revenue potential.
What is RPM?
- RPM (Revenue per Mille) means revenue per 1,000 views.
- It varies based on niche, audience location, and advertiser demand.
- Higher RPM = more money with fewer views.
Top Profitable Niches for 2025
| Niche | Why It’s Profitable | Average RPM (USD) | Example Video Ideas |
| Personal Finance | Banks and fintech pay high for ads | 12–25 | “Best Credit Cards in 2025” |
| Tech & AI Tools | Explosive demand, huge user base | 8–15 | “Top 5 AI Tools You Need Now” |
| Online Business & Side Hustles | Attracts aspiring entrepreneurs | 10–20 | “Easy Side Hustles That Work in 2025” |
| Luxury & Travel | Premium advertisers target wealthy audiences | 15–30 | “Inside a $5,000/Night Resort” |
| Health & Fitness | Evergreen, global demand | 7–12 | “10 Minute Home Workout” |
| Education & Tutorials | Lifelong learning, students, professionals | 6–12 | “Excel Tips You Should Know” |
| Software Reviews (B2B/SAAS) | Companies pay high ad rates | 20–40 | “Best Project Management Software 2025” |
Pro Tips for Picking a Profitable Niche
- Target higher RPM niches first if your main goal is income.
- Check competition—if you’re in finance, try sub-niches like budgeting apps or credit score tips.
- Blend RPM + demand: Don’t pick the highest RPM if nobody searches for it. Balance is key.
- Think global: If your niche appeals mainly to the U.S., U.K., and Canada, your RPM will be higher than niches targeting lower-ad-rate regions.
Beginner Path
- If you want fast monetization: Go with niches like Health or Education (lower RPM but easier to grow).
- If you want high long-term income: Choose Finance, Tech, or Software (higher RPM, more competition).
- Always validate with YouTube search and competitor analysis before committing.
How Much Can You Earn?
Not all views are equal. A million views in comedy might earn $1,000, while a million views in insurance or finance could bring $30,000. That’s the power of choosing the right niche.
Monthly Earning Potential by Views and RPM
| Monthly Views | RPM $5 (Low) | RPM $10 (Medium) | RPM $20 (High) | RPM $40 (Very High) |
| 100,000 | $500 | $1,000 | $2,000 | $4,000 |
| 500,000 | $2,500 | $5,000 | $10,000 | $20,000 |
| 1,000,000 | $5,000 | $10,000 | $20,000 | $40,000 |
| 5,000,000 | $25,000 | $50,000 | $100,000 | $200,000 |
What This Means for Beginners
- Low RPM niches (entertainment, vlogs) need millions of views to earn big.
- Medium RPM niches (education, health, fitness) can bring a few thousand per month with consistent uploads.
- High RPM niches (finance, real estate, online business) can hit five figures monthly with fewer views.
- Very High RPM niches (insurance, B2B software, investing) are the most competitive but the most profitable.
Pro Tips to Boost Earnings Beyond AdSense
- Add affiliate links: Example—finance channels linking to credit card offers.
- Include sponsorships: Tech companies pay creators to review or mention tools.
- Sell digital products: E-books, templates, or courses related to your niche.
- Use email lists: Drive YouTube viewers to a mailing list where you can promote offers.
Section 8: Case Study – A Realistic Look at Earnings
The Story
“Neil, let me tell you something,” said Alex, leaning back in his chair with a smile. “Last year, I started a YouTube channel in the health and fitness niche. Nothing fancy—just workout tips, diet explainers, and a few list-style videos about healthy habits. I didn’t show my face. Everything was automated. Scripts came from AI, voiceovers from Murf, and I edited with free tools like CapCut.”
Neil raised his eyebrows. “So you didn’t spend much?”
“Not at all,” Alex laughed. “I only invested in a Canva Pro subscription for better thumbnails. That’s it. My first three months were slow—barely 1,000 views per video. But by the sixth month, one of my ‘10-Minute Morning Workouts’ videos took off. That single video brought in 50,000 views in a month.”
“And the money?” Neil asked, curious.
Alex pulled up his dashboard. “Here’s the thing. The health niche has an average RPM of about $8. With around 200,000 views per month across all my videos, I now make about $1,600 monthly just from AdSense. It’s not life-changing yet, but it pays my rent. And because it’s automated, I’m not spending hours filming or recording.”
Neil nodded slowly. “So you’re proving this works—even without showing your face.”
“Exactly,” Alex said. “Now, if I were in finance, those same 200,000 views could make me $4,000 or more. But I chose health because it’s evergreen and easier to grow into. The key is: pick a niche that fits you, then let automation do the heavy lifting.”
Niche Comparison (Same 200,000 Views)
| Niche | Average RPM | Estimated Monthly Income |
| Personal Finance | $20 | $4,000 |
| Tech & AI Tools | $12 | $2,400 |
| Health & Fitness | $8 | $1,600 |
| Online Business & Side Hustles | $15 | $3,000 |
| Entertainment (Low RPM) | $3 | $600 |
Takeaway
Alex’s story shows that any niche can work, but the same views can lead to very different incomes. Beginners should balance growth speed (health, education, entertainment grow faster) with earning potential (finance, tech, business earn more).
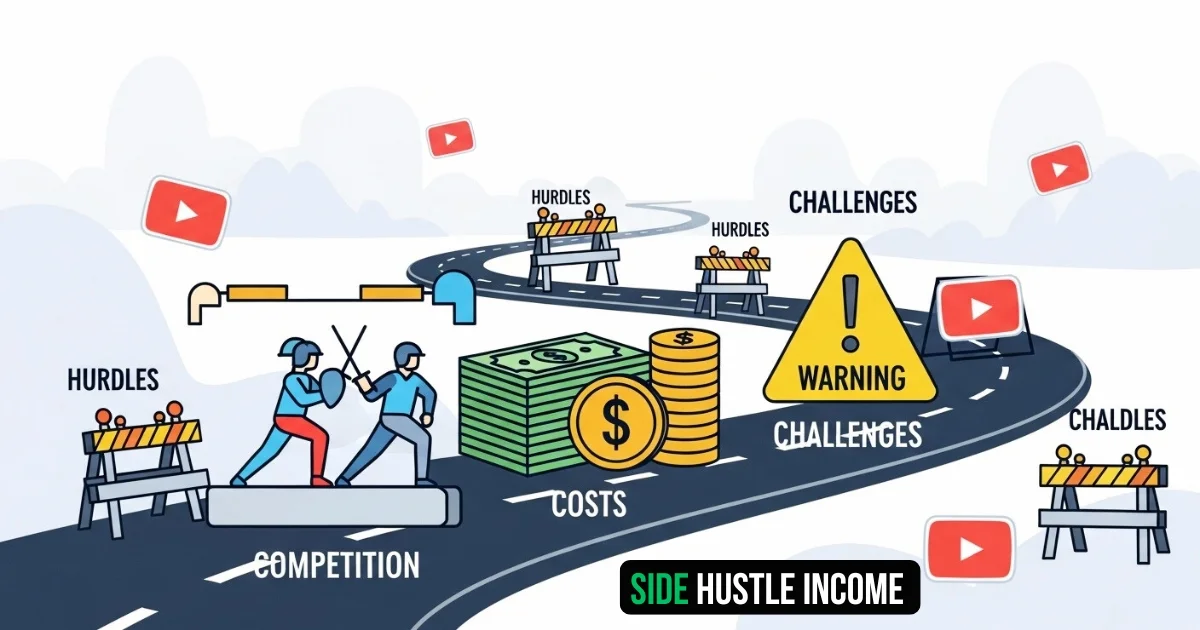
Section 9: Challenges in YouTube Automation
YouTube automation sounds like passive income magic—but the truth is, it’s not effortless. Many beginners get stuck, quit too early, or face monetization issues. Here’s what you need to know upfront.
1. High Competition
- Popular niches like finance, tech, and health are flooded with creators.
- Standing out requires better scripts, sharper thumbnails, and unique angles.
2. Monetization Delays
- To join the YouTube Partner Program, you need 1,000 subscribers and 4,000 watch hours.
- For beginners, this often takes 3–6 months of consistent uploads.
- Relying only on ads means you’ll earn nothing in the early phase.
3. AI Content Risks
- Low-quality AI voiceovers or generic scripts may get flagged as “reused content.”
- YouTube reviewers check for originality—copy-paste or robotic voices can lead to demonetization.
4. Outsourcing Costs
- Hiring freelancers for scripts, voiceovers, and editing can quickly run $200–$500 per month.
- If your channel isn’t earning yet, this creates financial stress.
5. Platform Dependence
- YouTube’s policies change. A rule update could lower RPMs or make automation harder.
- Example: Some channels lost monetization in 2023 because they used repetitive, low-effort AI content.
6. Burnout from Consistency
- Even with automation, you need planning and strategy.
- Uploading 2–4 times a week requires discipline to keep the system running smoothly.
Pro Tips to Overcome These Challenges
- Start with free tools: Don’t overspend before you earn.
- Mix AI with human editing: Always review and polish AI output.
- Diversify income: Add affiliate links and sponsorships early, don’t rely only on AdSense.
- Focus on quality over quantity: 2 solid videos per week beat 5 sloppy uploads.
- Be patient: Most successful channels take at least 6–12 months to reach stable income.
Common Beginner Mistakes to Avoid
- Copy-Pasting Other Creators’ Content
- Many beginners take scripts or visuals directly from other YouTubers.
- This is a fast track to demonetization. Always rewrite in your own words or with AI help.
- Relying Only on Free AI Voices
- Using generic, robotic text-to-speech that thousands of others use makes your channel look low effort.
- YouTube can reject monetization if reviewers think it’s spammy.
- Overloading Videos with Stock Footage
- If your video looks like a slideshow of random stock clips, viewers click away.
- Stock is fine, but balance it with AI visuals, text overlays, or animations.
- Ignoring Thumbnails and Titles
- Beginners often upload with plain or rushed thumbnails.
- Even great videos won’t perform if the packaging is weak.
- Chasing Too Many Niches at Once
- Uploading one finance video, one health video, and one tech video confuses the algorithm.
- Stick to one niche until your channel grows.
- Expecting Fast Money
- Some beginners quit after 2 months because they aren’t earning yet.
- Remember: monetization takes time, and the first 6–12 months are often about growth, not profit.
- Neglecting Optimization
- Skipping proper descriptions, tags, or playlists reduces discoverability.
- Beginners often miss this simple step that boosts visibility.
Quick Fixes for Beginners
- Always analyze, don’t copy competitors.
- Upgrade to better AI voices or freelancers once you can.
- Mix stock + custom visuals for originality.
- Treat thumbnails as 50% of your success.
- Stay in one niche until you’re established.
- See the first year as building mode—don’t expect overnight results.
Section 10: Action Plan for Beginners
Reading guides is easy. Taking action is harder. To avoid getting stuck in research mode, here’s a simple beginner’s roadmap you can follow step by step.
Step 1: Pick Your Niche
- Choose one niche only—finance, health, tech, or side hustles.
- Use YouTube search and Google Trends to confirm demand.
- Write down at least 20–30 video ideas before you move forward.
Step 2: Collect Your Tools
- Start with free tools: ChatGPT (scripts), CapCut (editing), Canva (thumbnails), Bing Image Creator (AI visuals).
- Upgrade later to ElevenLabs (voice), Photoshop (design), or Premiere Pro (editing) once your channel grows.
Step 3: Create Your First Scripts
- Write 3–5 scripts using AI + your own edits.
- Keep them 800–1,000 words long for 6–10 minute videos.
- Read them out loud to check flow and tone.
Step 4: Generate Voiceovers
- Use free AI voices to test (CapCut, Clipchamp).
- If monetization is your goal, upgrade to ElevenLabs or Murf when possible.
- Make sure your voice sounds natural and clear.
Step 5: Design Thumbnails
- Study the top 20 thumbnails in your niche.
- Recreate the style (not copy) using Canva.
- Keep it simple: bold text, one focal image, bright colors.
Step 6: Edit Your Videos
- Start small: 1–2 minute practice edits in CapCut or DaVinci Resolve.
- Add background music and captions for engagement.
- Aim for fast pacing—switch visuals every 3–5 seconds.
Step 7: Upload and Optimize
- Title: Keyword + hook.
- Description: 2–3 strong intro lines, then details + links.
- Tags: Mix broad and niche-specific keywords.
- Add end screens and playlists.
Step 8: Stay Consistent
- Upload at least 2 videos per week for the first 3 months.
- After 90 days, analyze which videos perform best and double down on similar topics.
Step 9: Monetize and Scale
- Once you hit 1,000 subs and 4,000 watch hours, apply for AdSense.
- Add affiliate links in descriptions for early revenue.
- Reinvest income into better AI tools or freelancers to scale.
Beginner Checklist (Quick View)
- Pick 1 niche
- Research 20+ video ideas
- Write 3–5 scripts
- Record/test voiceovers
- Design thumbnails
- Edit and upload first 3 videos
- Stay consistent for 90 days
- Track what works, then scale
Top 5 YouTube Automation Channels
Here are five of the best and most successful YouTube automation (faceless) channels, selected based on subscriber count, viewership, and revenue potential as highlighted in recent analyses for 2025. These channels use outsourced teams for scripting, voiceovers, and editing to produce high-engagement content without on-camera appearances. I’ve included direct links to their channels.
- Facts Verse
- Subscribers: 9M+
- Niche: 80s Pop Culture & Nostalgia
- Link: Facts Verse
- Alux.com
- Subscribers: 4.3M+
- Niche: Business, Success & Luxury
- Link: Alux.com
- MagnatesMedia
- Subscribers: 4M+
- Niche: Finance & Money Stories
- Link: MagnatesMedia
- Mr. Nightmare
- Subscribers: 6M+
- Niche: Horror Storytelling
- Link: Mr. Nightmare
- MostAmazingTop10
- Subscribers: 7M+
- Niche: Top 10 Lists (Mysteries & Facts)
- Link: MostAmazingTop10
Conclusion
YouTube automation isn’t a shortcut to overnight riches. It’s a system—a repeatable process of picking a niche, writing scripts, generating voiceovers, designing thumbnails, editing, and uploading consistently. With patience and discipline, it turns into a machine that builds income month after month.
The real advantage is freedom. You don’t need to show your face. You don’t need expensive gear. You don’t even need years of experience. You just need to start with what’s free, improve over time, and stay consistent long enough for YouTube to reward you.
Bonus: Monetization Hacks Beyond Ads
- Affiliate Links: Promote products related to your niche (fitness gear, software, finance apps). Even a small channel can earn commissions.
- Sponsorships: Once you cross 10,000+ subs, brands may reach out. Or you can pitch them directly.
- Digital Products: Sell e-books, templates, or courses tied to your niche.
- Email List: Collect viewer emails with a free guide, then market products later.
Final Takeaway
Start small. Stick to one niche. Publish consistently. Learn from your competitors but create your own style. The first 90 days won’t make you rich, but they’ll build the foundation. Twelve months from now, you’ll look back and realize YouTube automation isn’t just a side hustle—it can be a real business.
Disclaimer
We’re not promising lottery winnings on Side Hustle Income. Your results will depend on how much time you put in. But here’s what we CAN promise – these are 100% free, legal ways to make real money from your couch. No funny business.
So… what are you waiting for? That money isn’t going to earn itself! 💸
